
Hi fans,
Obviously I'm in love with those cute Fiddlers Green models. Especially when you don't have much time, small models like these are just what the doctor ordered. Also, I wanted to find out if the experience I have gained with Halinski and Pirling models spills over to one's ability to build simpler models.
My choice this time is a racer, of which FG has brought out a whole series. Those racers constituted an important and colourful era in aviation history and FG has pretty well the complete line-up available.
Not sure why I had to pick the Chester Goon of all planes...maybe you guys can help me out there...
Anyway - let's get going!

| Click here if you would like to go to the Fiddlersgreen page where you can get the Chester Goon model and follow along with this tutorial |
Dyed-in-the-wool FG model'n pals will right notice away that something's not quite right here - this guy cuts off all the glue tabs...!!! Yep, he does...!
After all, our motto here is - "No respect and proud of it!"
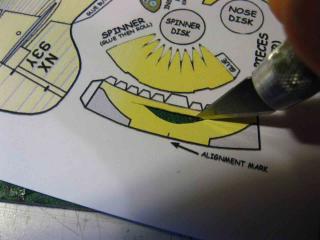
No, serious - the real reason is that I will cut out the glue tabs seperately and glue them behind the exterior skin. This way I get a much neater joint happening at the seam.
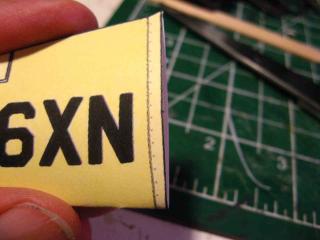
The fuselage gets pre-shaped by dragging it over the table edge and a metal rod so that it will be a lot easier to assemble it. And here comes the best oif the best - we owe our friend Martin (Sparrowhawk) that we never again in our whole life have to cut out those pesky little triangular glue tabs. We just glue the separated tabs behind the skin and pinch them in with our thumb nail. Hey Martin, that was the best tip I ever gleaned from the forum!
 |  |
 |  |
 |  |
We do the same with the rear fuselage - cut off the glue tabs and no more belly-aching...
However when we glue the rear part together we have to be aware of a couple of things:
FG has attached the glue tab from main to rear fuselage at the front end of the rear fuselage.
This makes the attchment of it pretty tricky because the shape of the rear fuselage will cause it to spread larger than the opening in the main fuselage just like the front of a party favour trumpet.
That's why I have, as you may have noticed, attached the glue tab to the main fuselage. This will then be inserted into the rear fuselage and fits a lot better.
So then, let's build the rear fuselage. Don't worry about the tailfin, for now all we do is glue the rear seam along the back of the fuselage together.
Once that is dry, we can then apply glue all around the edges of the tailfin halves, but not the inner area, just the edges! That's because we want the tailfin to retain its thickness that the shape of the fuselage gives it. This way it looks better and also stronger.
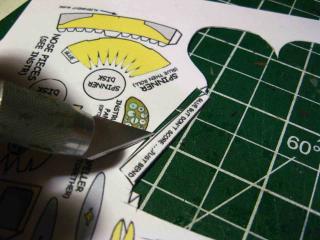
All we have to do now is to pinch the part exactly where I have my fingers on picture #5 and everything else will automatically fall into place. And lo and behold - the tailfin has retained a nice thickness, as can be seen nicely from the top.
 |  |
 |  |
 |  |
This is what the finished model looks like. Click on "Page 2" above to continue this tutorial. |
|
Okay, time to join the fuselage pieces.
Since I am going to make a clear canopy, I stuck in the instrument panel after stiffening it with cardboard. Then I added the seat which I elevated by a piece of cardboard set on edge and glued it to the fuselage bottom with crazy glue. It doesn't really have to hold much but you never know...
Then, for joining the fuselage pieces, I applied the glue inside the rear part.This way the glue will not ooze out by the sides as it would had I applied it to the glue tab on the main fuselage part.
I always get a real mess happening that way...
And with that the fuselage is pretty well done except for a couple of small but crucial details which we will add towards the end.
And - oh yes, the lettering on the nose has that certain something, doesn't it?
 |  |
 |  |
For the spinner I'm afraid we can't avoid cutting out the pesky little triangles.
However when you see my finished spinner, you probably think - man, this guy is patient - I'm sure he properly pre-shaped and glued every one of those tongues individually just by the book!
That's what you think.
After all - the first principle of the airgoon method is - lazyness wins!
All you do is, apply glue to the edges of the tongues, push the spinner into your palm and turn it. The round shape then happens all on its own.
 |  |
 |  |
Now the fun begins - it's the chin's and the nose's turn.
The way the design of this complex part has been solved is brilliantly simple. Just a tube and a shield hanging from underneath it - presto.
I cut out those tiny wedges and glued them all together individually with crazy glue, in order to get the roundness of the chin right before I'd attach it to the fuselage.
Biiiiig mistake!!! Hmm
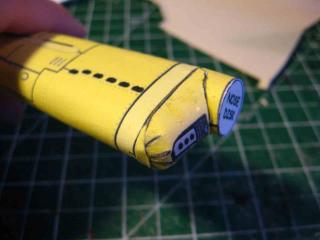
Turns out that the roundness of the chin has not been mathematically constructed, but was pure guesswork. After attching the front to the fuselage we are left with this scenario - A tiny little gap is gaping between the two parts...
 |  |
 |  |
 |
Note from Scottie: |
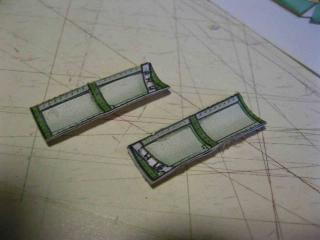
Now we cut out the elevators and stiffen them a little.
For that we trace the outline of the elevators on a piece of cardboard and then cut it out about 1/16" inside the outline.
Note that the stiffener should stop at the hinge line.
Then we make ourselves a nice little sandwich with the elevator skins and the stiffener as shown. We then apply some glue into the groove that runs around the circumference and squeeze the overhanging areas with our thumb and index finger to round the edges.
Then we rub over them with a metal rod which will smoothen it nicely. And that's it.
Do this only for the edges that go around the stiffener. The rear parts of the elevators do not get rounded, they get glued together conventionally.
 |  |
 |  |
 |  |
|
| And this is what the finished elevators look like. When held at a certain angle to the light, one can nicely see the resulting shape of the elevator surfaces. |
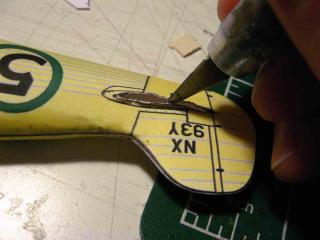
All that's left to do is to now make a cut in each side of the rear fuselage.
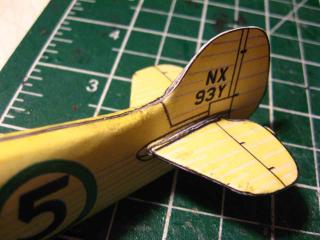
This cut we then widen a little with the resulting lips pointing outward. This will give us a nice "fairing" between the elevators and the fuselage.
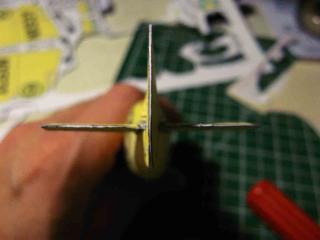
Now after we pushed the elevator in and before we glue it, we want to make sure that the elevator is exactly square to the rudder. This we do simply by bending it.
After all there is nothing worse than a paper model where the geometry is off.
.
 |  |
 |  |
When FG thinks they are good at guessing the shapes of the parts, so am I!
I printed out a second copy of the Goon and picked a part with the matching colour to make myself a filler for the gaping hole in the chin. Also completely by guesswork. So there...!!! And it turned out good right on my first try.
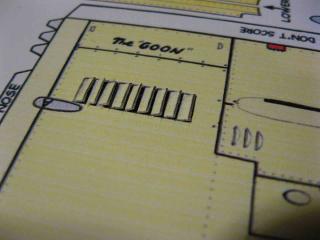
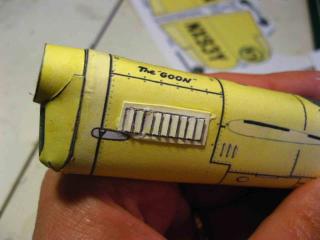
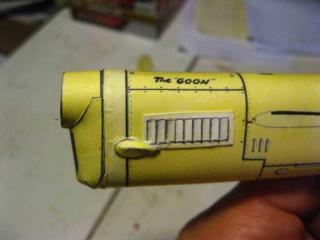
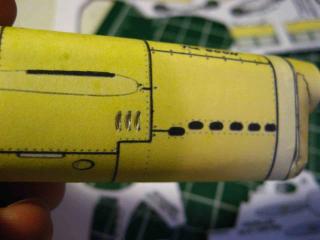
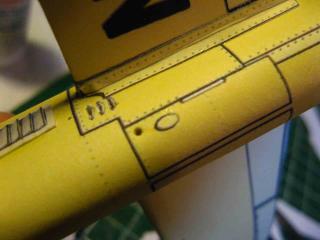
The second printout is also good for something else I had in mind, I wanted to make the louver vents in 3d. In real life they would actually bend inwards but who's gonna know...
You have to be very careful not to cut those little louvers off. I still managed to have one fall off on me, so I had to glue it back on with lots of patience. Then I left some material around them as I cut them out and, as Chip would say, "afix" them at the proper spot on the fuselage.
Right beside it we add that little egg-shaped do-hickey which improves the visuals even more. That do-hickey has a tiny little glue tab, which I of course completely ignored. Just fits better this way.
Then I cut those tiny little vents into the fuselage and the whole thing starts to look pretty spiffy.
.
 |  |
 |  |
 |  |
We continue with the wings.
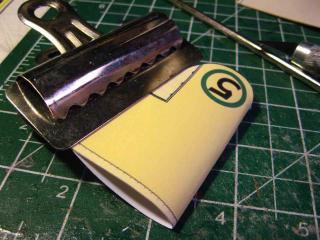
Not much to report, except, to get the pesky rear edges straight, I like to fall back on my trusty office clamps. Works exceptionally well!
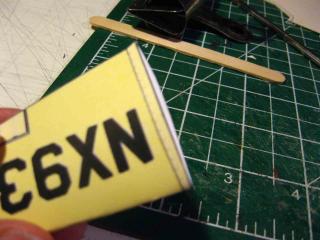
The parts where the wings butt on to the fuselage are, again, probably pure guesswork.
Once I saw a picture of a model of the Chester Goon whose builder implicitly trusted the drawn shape of the wing roots and the wings stuck up at a 20 degree angle.
The model looked like a duck during mating season... chuckle That's not how I'm going to do it...
I cut back the lower edge of the wing root so that it pretty well matches the upper one. Later it will be covered by fairings anyway.
.
 |  |
 |  |
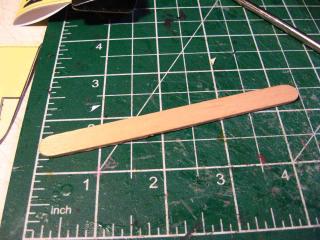
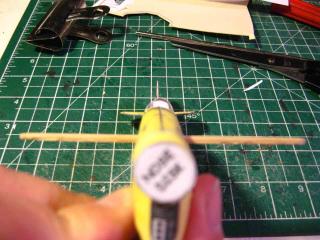
Now here is something that should not be missing in any FG shop, and that is the trusty old ice-cream stick. It will stiffen the wings and hold them at the proper angle.
You may wonder how on earth are we to expect a straight stick to give us the slight dihedral of the wings?
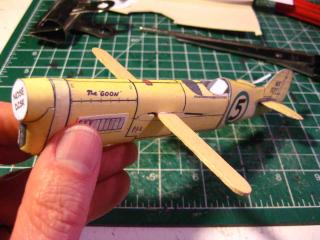
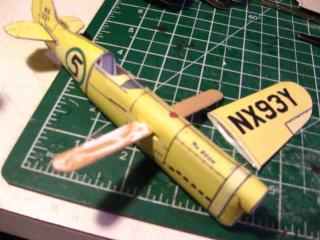
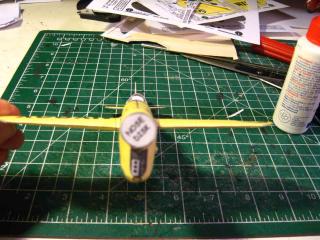
Easy. We only attach the top halves of the wingskins to the stick, not the bottom halves. Sine the wings are tapered, this will give us the slight dihedral we want on this model. On the original this dihedral was very small, and that's exactly the effect we want.
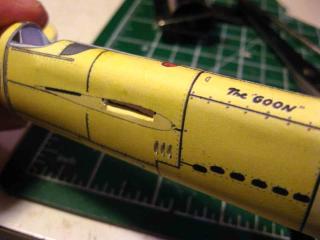
That said, we cut out the frontmost slits drawn on the fuselage and widen them downwards, enough for the stick to fit through.
This doesn't have to be pretty but we do want to make sure the stick is nice and square. Once it is, glue it in place and attach the wings.
But, as I said, glue the wingskins ONLY TO THE TOP SIDE OF THE STICK and to the fuselage, not the bottom of the stick.
.
 |  |
 |  |
 |  |
|
| And this is what the Goon looks like at this stage... |
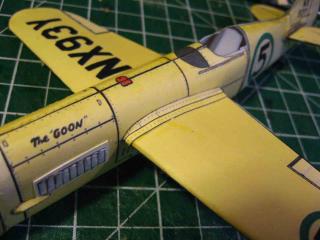
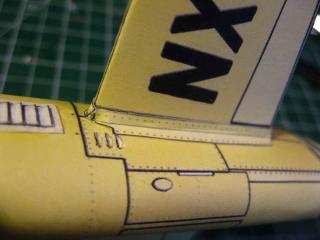
Now it's time to add the fairings at the wingroots. They fit well.
 |  |
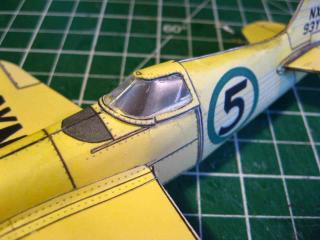
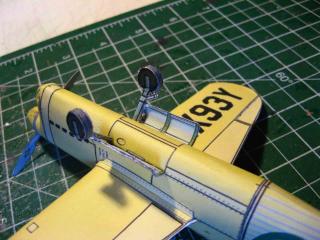
Of course as always the canopy will be made transparent.
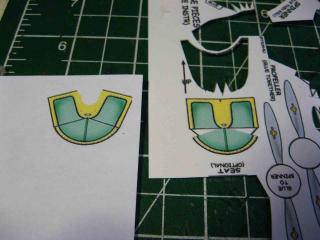
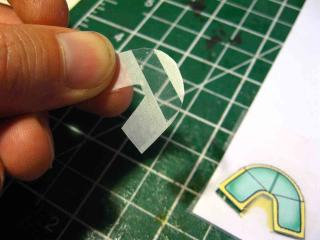
The design of the paper canopy is a bit awkward to use as a template for the transparent foil, so I made my own in PhotoShop so that it will remain one single piece.
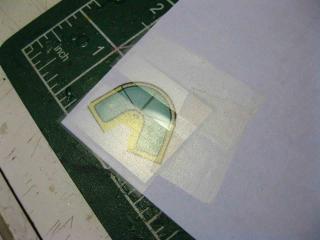
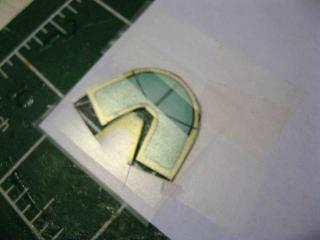
I fixed the foil on top of the template with "low-tack" tape and then cut it out just like any normal paper part. Then I just had to lift off the foil and remove the tape.
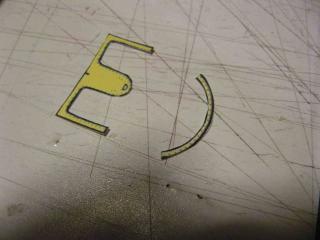
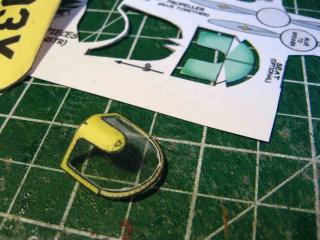
For the frame however, we can use the original part, it is well suited for that by design. At first I applied the "E" shaped part, then the small curved strip along the front.
.
 |  |
 |  |
 |  |
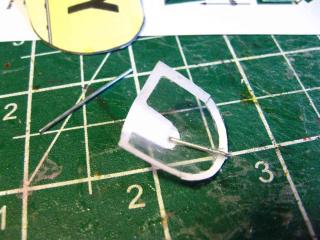
Judging by the original part, the canopy has a stiffening rod at the front. I made one from florist wire and attached it with crazy glue. It just adds that little extra.
 |  |
 |  |
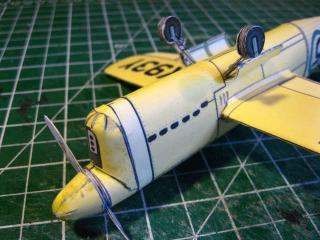
Finally we do the landing gear.
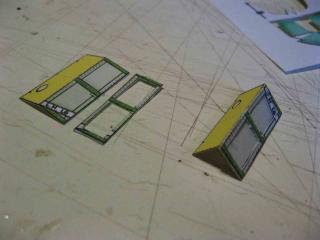
I embellished gear doors with a cut-out of the stiffening frame which is drawn on the inside of the doors from my second print-out.
Unfortunately in the heat of the battle I forgot to take pictures of the landing gear legs into which I inserted a piece of florist wire that sticks out by about 1/4".
These get pushed into that little hole I made at the upper front of the drawn-on gear doors.
The legs then were attached with crazy glue and mounting the gear doors added a little more support to the gear.
Now before the glue sets, we want to make sure the aircraft is standing nice and square!
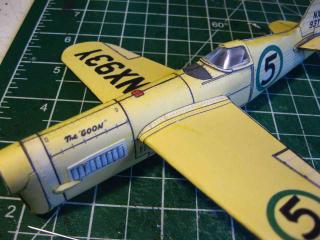
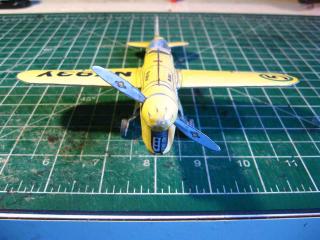
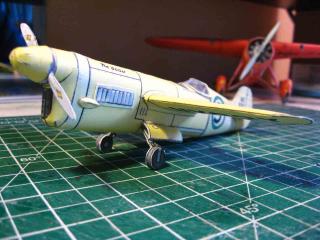
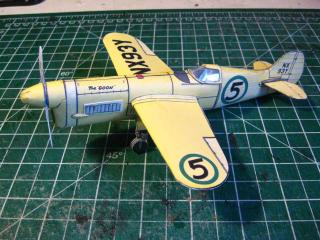
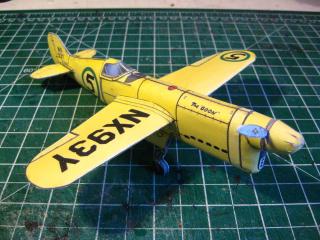
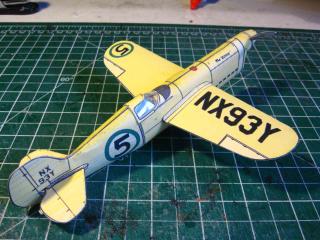
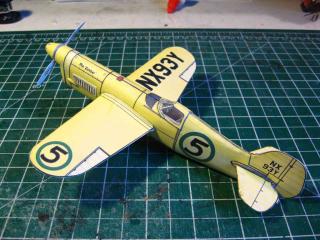
And - that's it! The airgoon proudly presents - the goon!!!
Thanks for your interest - Norm
.
 |  |
 |  |
 |  |
Okay folks,
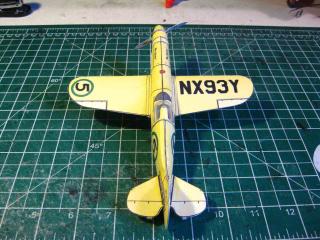
here are the pictures of the finished goon.
It's crazy what those guys back then were willing to do just to keep themselves from getting bored.
Those machines probably handled like bucking broncos!
The pilots probably didn't care about safety at all, all they wanted was as much speed as possible...
But they are still quite pretty
 |  |
 |  |
 |  |
Hi folks,
My name is Norm, I have been active in the German papermodelling community for years as member of several forums. Right now I am active in the Kartonist.de forum as the famous "airgoon" (I know, I like to lay it on pretty thick ...LOL but that's the kinda guy I am).
I have been building mostly those polish really detailed kits like Maly Modelarz, Fly Model, GPM and especially Halinski, exclusively aircraft of course, hence my forum name.
But suddenly I caught a fever that made me take relatively simple models and jazz them up a little. Doing so I did ten of the lovely railway models by a certain Albrecht Pirling, who started out designing the models only for his little nephew but which have in the meantime gathered quite a following in the German forums and recently even got the attention of Scott.
As my popularity grew (I know, I'm just too good to be true. hahahaha......ahem...), I started the "Goon Academy" which has become known even outside the forum, in which I took a couple of "students" by the hand through an entire Pirling model, built and enhanced by what they keep referring to as the "Goon-method". Of course I wasn't gonna argue about them referring to my techniques as such.
Just to explain - the "Goon Method" is to get the most spectacular results possible with the least effort possible. Somehow the latter part has always been stressed even more than the first...
So, after the "Goon-Academy" was over, we had a number of models in the forum that were built with my kamikaze-style model enhancement. Moreover, some of the guys took my method even further and put their own slant on it. This is something I greatly encouraged them to do, and now they are all proud owners of a "Goon-style" model and a real "Goon Certificate".
As you can see, we mean business around here!
I also wrote a whole collection of my crazy techniques which I called "Norm's dirty tricks".
One forum that doesn't exist any longer actually made a PDF book out of it and made it available for its members.
Right now my "Dirty Tricks" are available in the Kartonist.de forum in the form of a regular thread, unfortunately at this point only in German.
I have also done some actual model designing. A German publisher called Wilhelmshavener Modellbauboegen (WHV for short) has published a model of the aircraft carrier "Nimitz".
I have been given the honour of designing the six aircraft that are included with this model.
For some strange reason however, even though I have
been busy with all this highly ambitious stuff, I have been a subscriber
to Fiddlers green for all these years, even while I was going through
my heaviest mega-masochist-high-detailed-
There was something about the FG models that just talked to me, even though some entire FG models have fewer parts than one engine cylinder of a Halinski model does.
The happy drawings, quips, snippets and anecdotes on every FG sheet just made me want to collect them even if I hardly ever built any.
I think it was Chip's incredibly colourful personality coming through loud and clear on every sheet.
In the meantime, the FG models grew on me to such an extent, that I just couldn't resist them any longer, I just had to start building them, most notably a couple of years back I did the airship "Norge" and just recently the Lockheed Vega.
Way back I even picked twelve of the most spectacular looking FG Fokker tri-planes from the "Flying Circus" collection and made a mobile out of them which I hung from the ceiling.
But that was really long ago.
It all came crashing down on one enchanted evening and that was the end of it.
And folks, it looks like I may be around now quite a bit to build a whole lot more of those lovely FG models and to share my expertise with you.
Some models I may build straight, but I always like to find some ways to spruce them up just a little, like wrapping the outer skin over the body of the Norge or cutting the windows out on the Vega. Lots of fun stuff for sure...so stay tuned for some real Goon action!
Your model'n pal
Norm,
a.k.a. the famous airgoon